Scheduling an email in Gmail is relatively easy and involves only a few steps, as follows:
Step 1: Set up your email
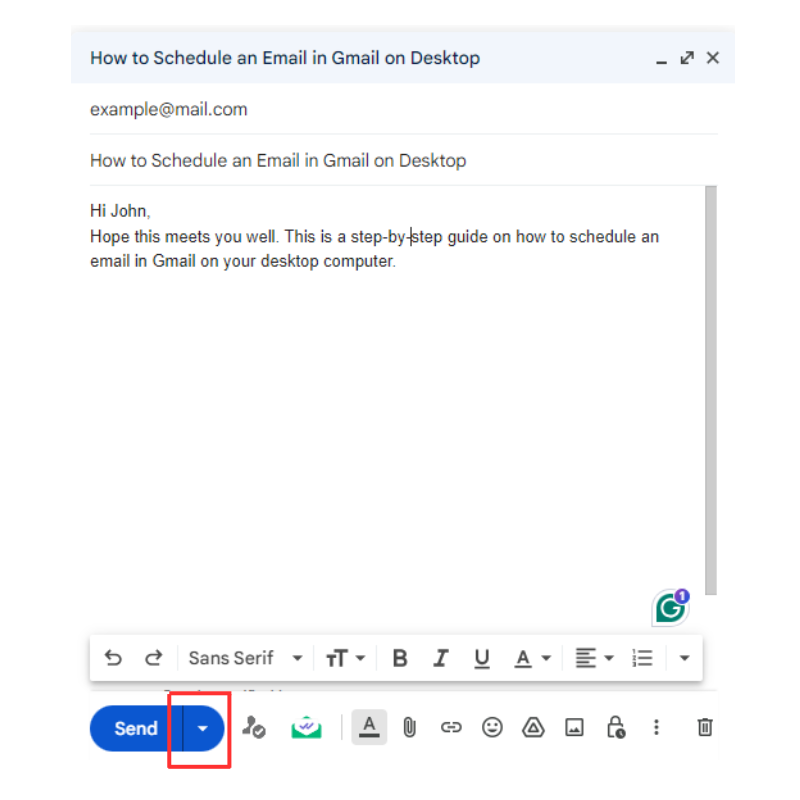
Scheduling an email to be sent later starts with creating the email. Open your Gmail account and click Compose. Then, set up your email – fill in the To and Subject fields and add your message to the text field.
Step 2: Click the down arrow in Send
Navigate to the down arrow next to the Send button. Click it. Be careful not to click on Send itself.

Step 3: Click Schedule send
Clicking the down arrow button in front of Send reveals the Schedule send button. Click it.

Step 4: Click the Pick date & time button
The Schedule send window shows three preset times and a Pick date & time button. You can click on any one of the preset times to schedule the email to be sent at that time. But to schedule your email to be sent at a time different from the presented preset times, click the Pick time & date button.

Step 5: Choose a specific date and time
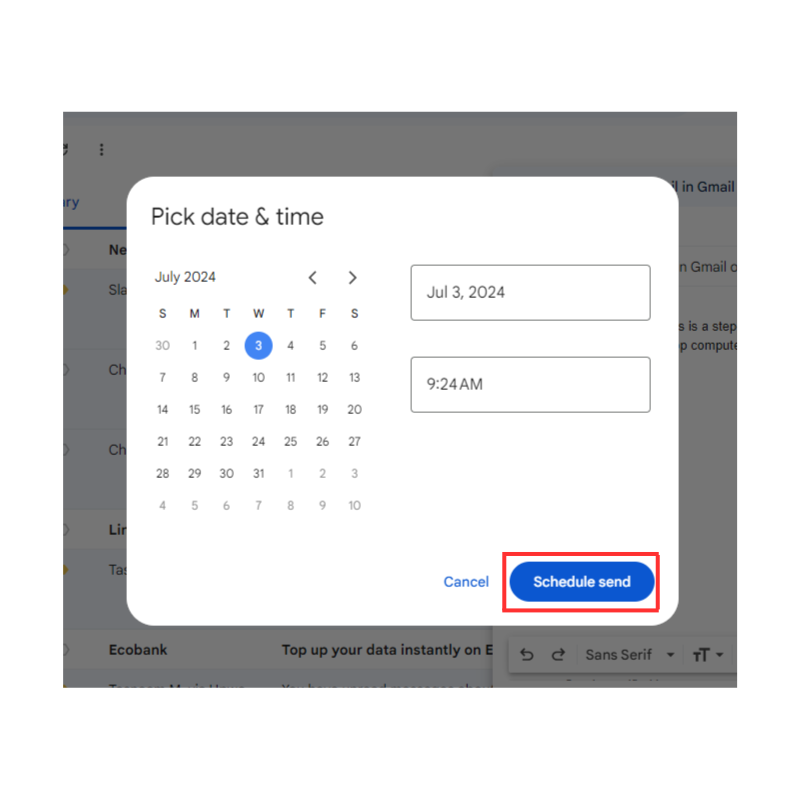
In the Pick date & time window, use the calendar to choose a date you’ll want Gmail to send the email. In the other text field, select the exact time Gmail should send the email on your chosen date.
When you’ve chosen your specific date and time, click the blue Schedule send button.

When you hit Schedule send, you’ll receive a confirmation pop-up telling you that your email has been scheduled to be sent on the date and time you chose. The pop-up comes with an option to undo the Gmail schedule send.
Gmail will send every scheduled email at its scheduled time. You can find all your scheduled emails in your Scheduled folder (just below the sent folder).
Was this article helpful?
That’s Great!
Thank you for your feedback
Sorry! We couldn't be helpful
Thank you for your feedback
Feedback sent
We appreciate your effort and will try to fix the article